Tusken Build Spring 2019
Here are some images of my *nearly* completed Tusken Raider.
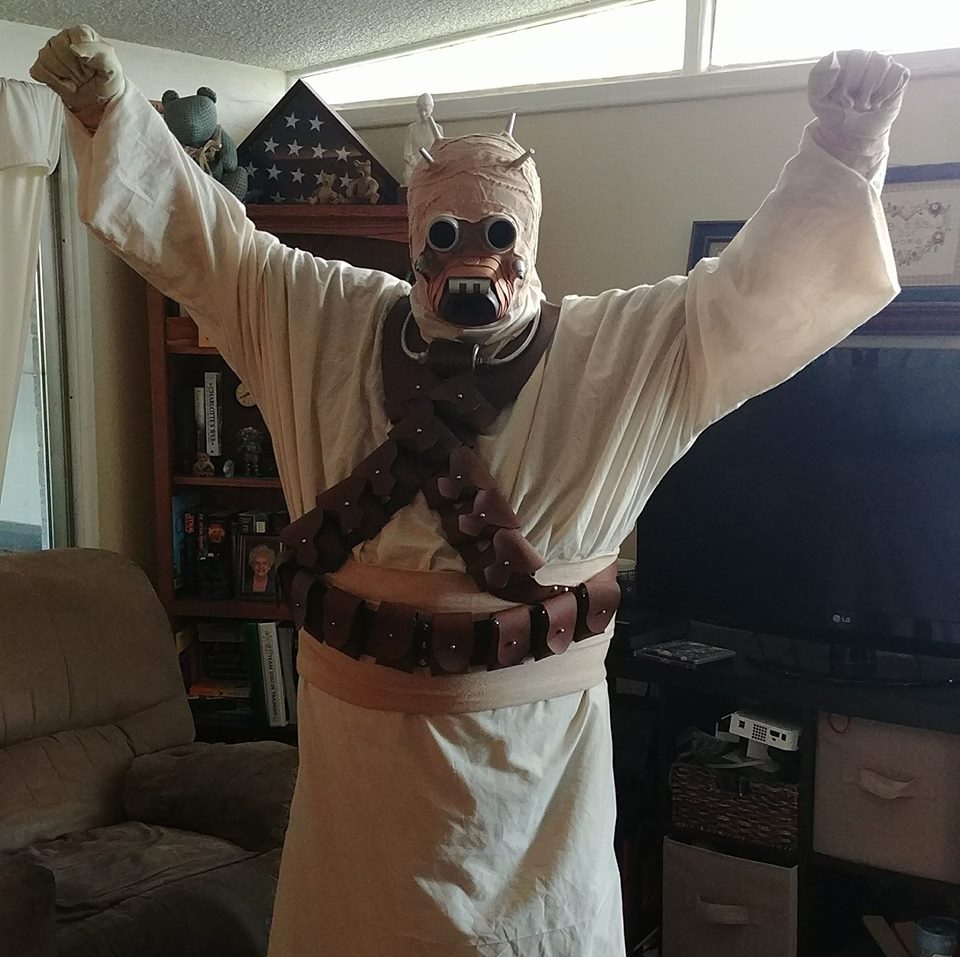
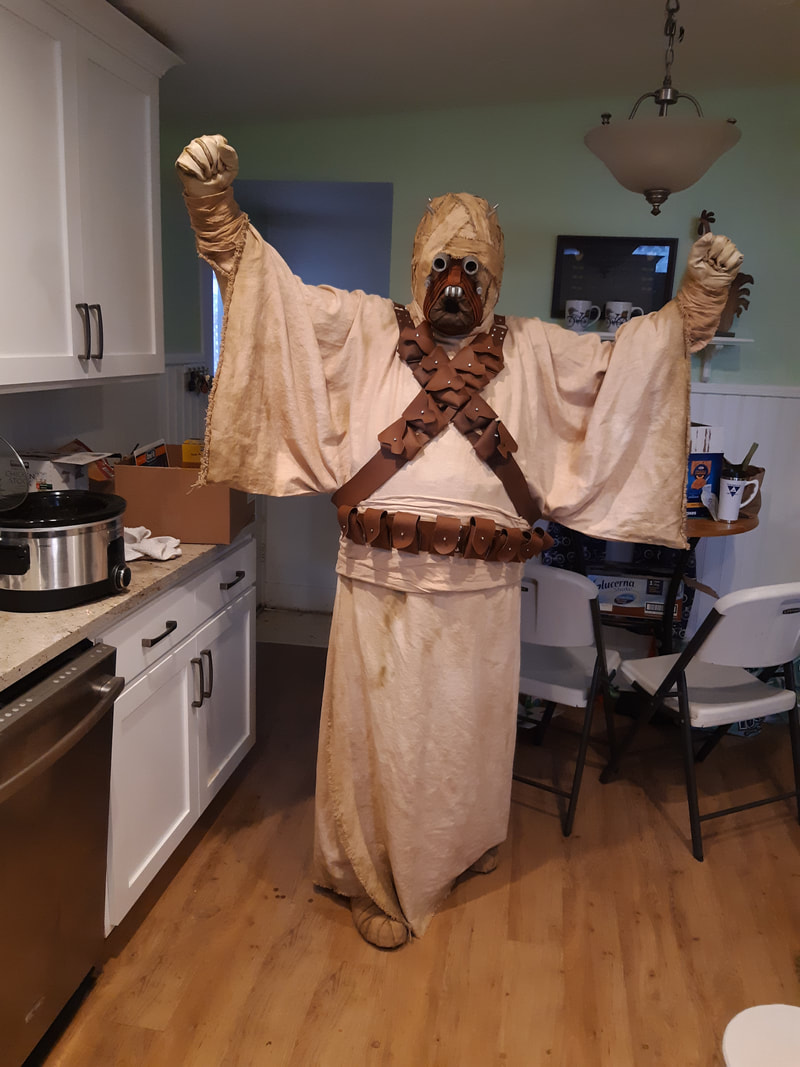
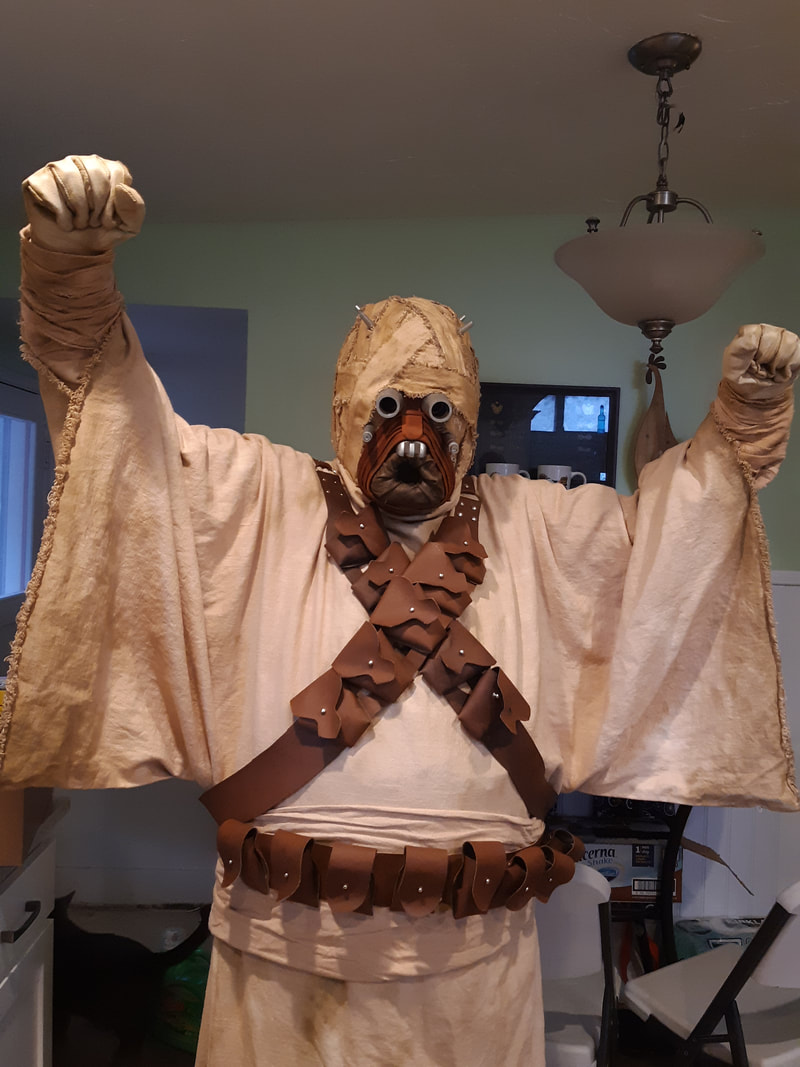
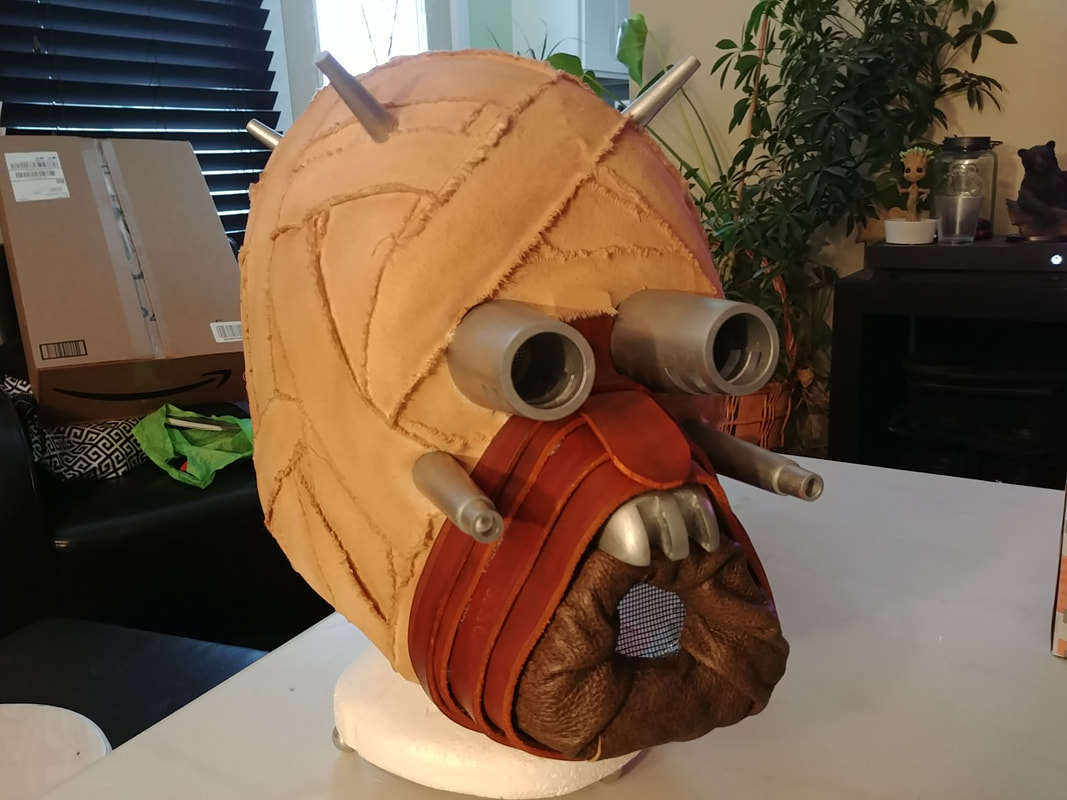
(Hopefully) Finished!! Mar 28 2019
We'll see what the 501st says, but I think I'm done.

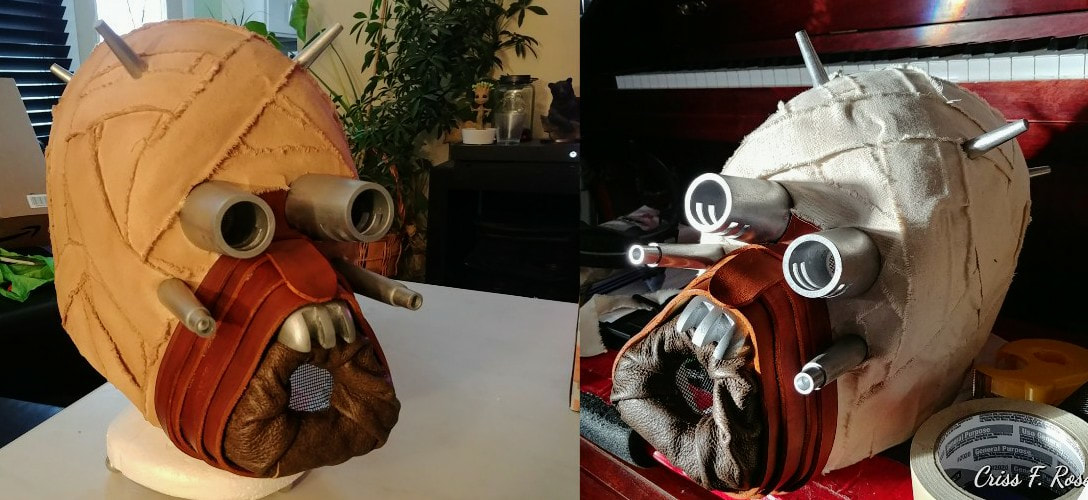
Weathering Mar 26 2019
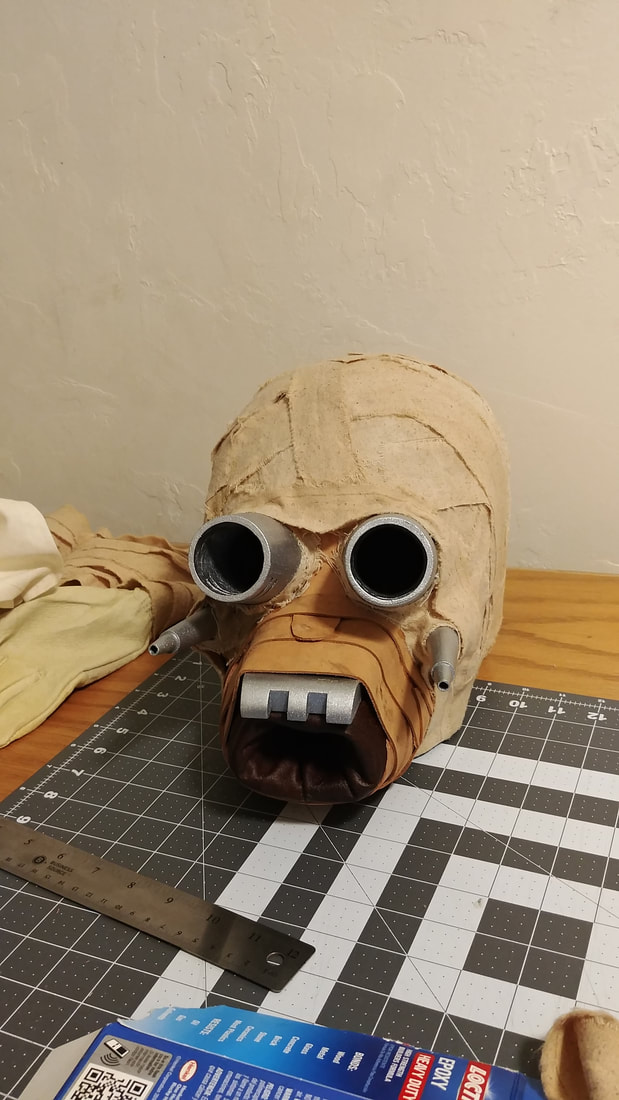
New Bucket Updates. March 2019
I was given some tips on making my bucket more screen accurate. First step, the wraps...
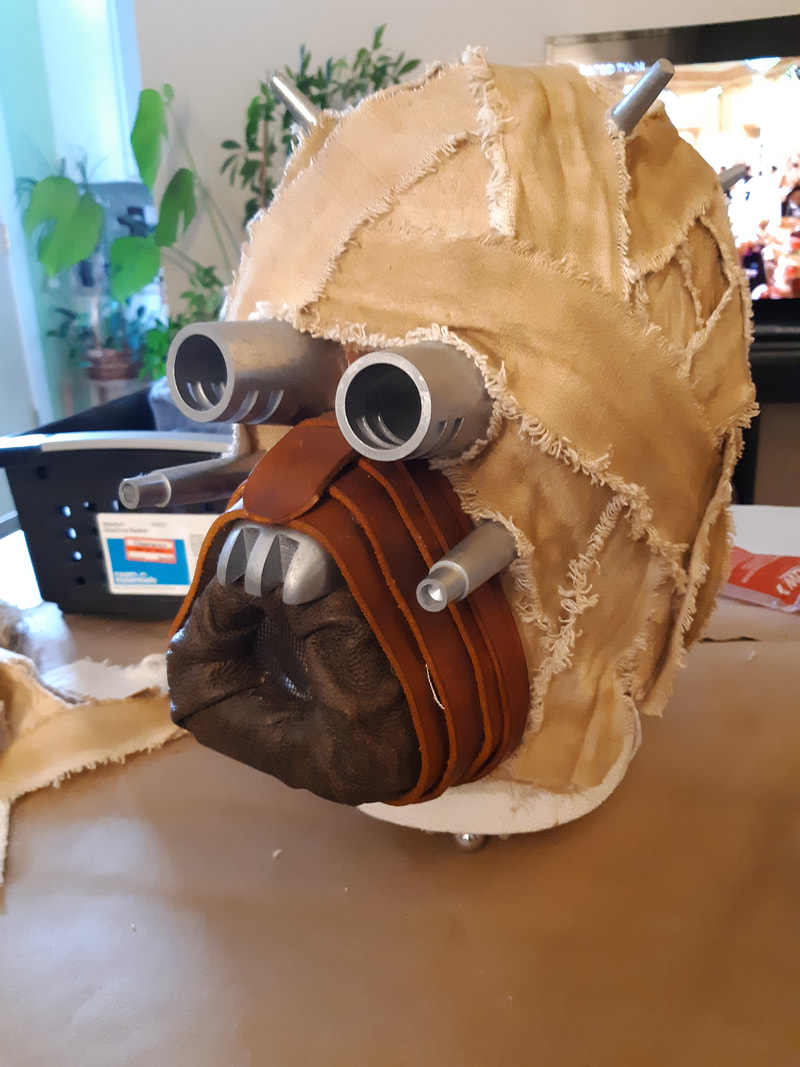
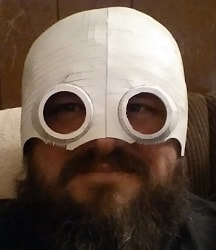
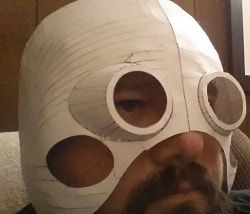
New Bucket - February 2019
My first bucket had some problems, so i built a new one for the 501st aproval. Here it is before and after some weathering.
Here are images of my build of the Tusken Raider for the 501st Leigon.
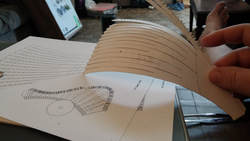
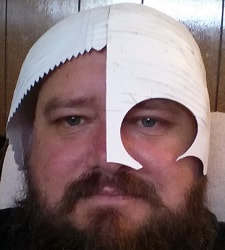
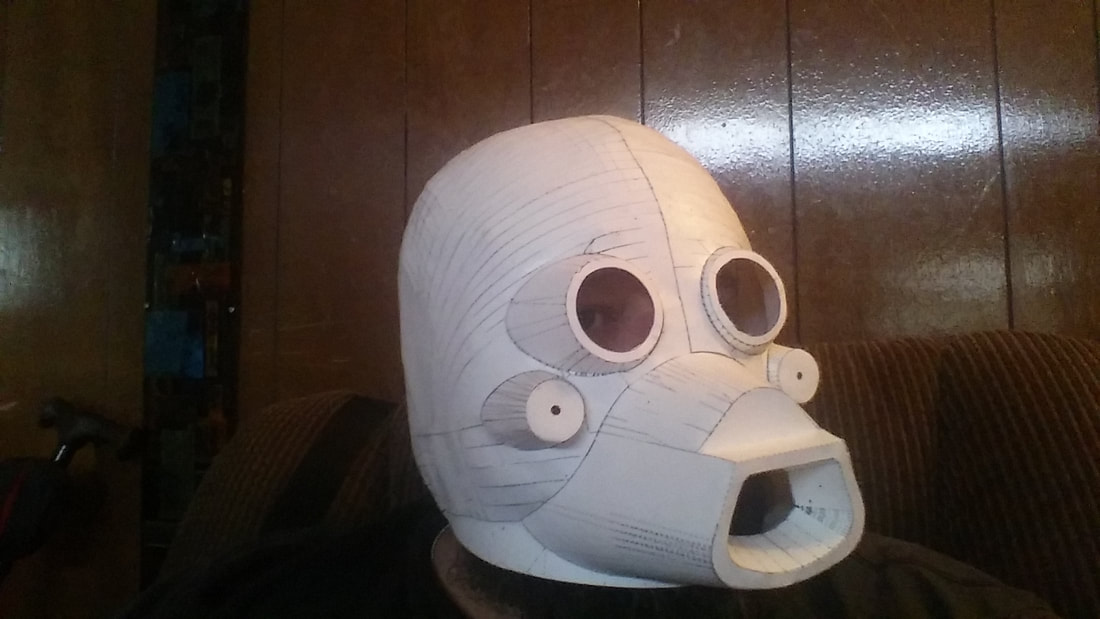
I started with a stack of 100# paper cardstock and a Pepakura pattern. Using scissors, glue, and a LOT of time... I built the base of the helmet.
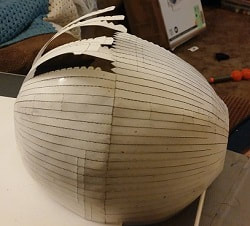
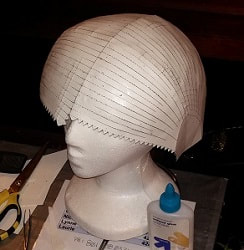


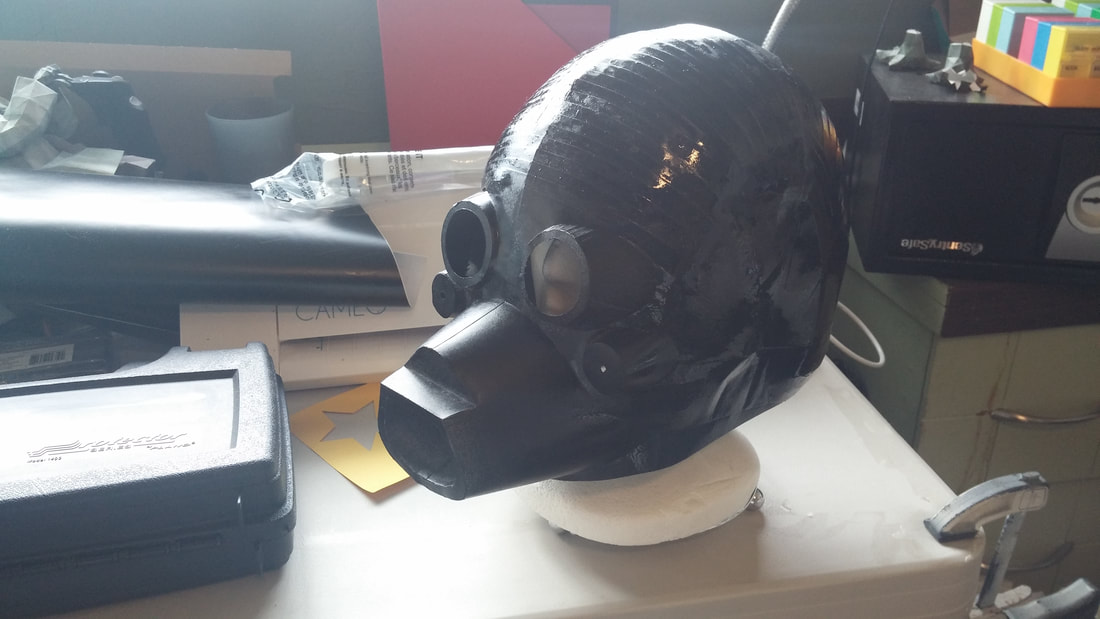
Next I sealed the paper with 4 coats of PlastiDip; inside and out.
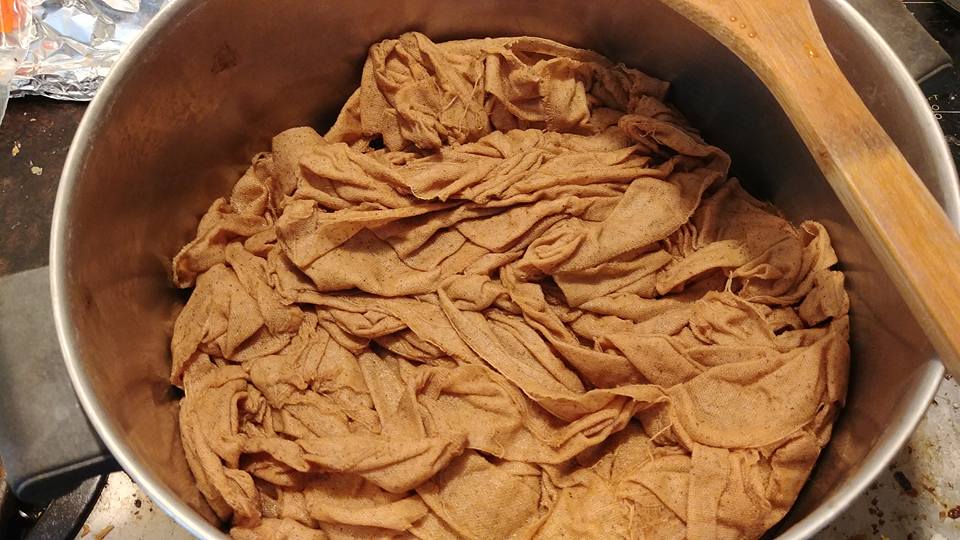
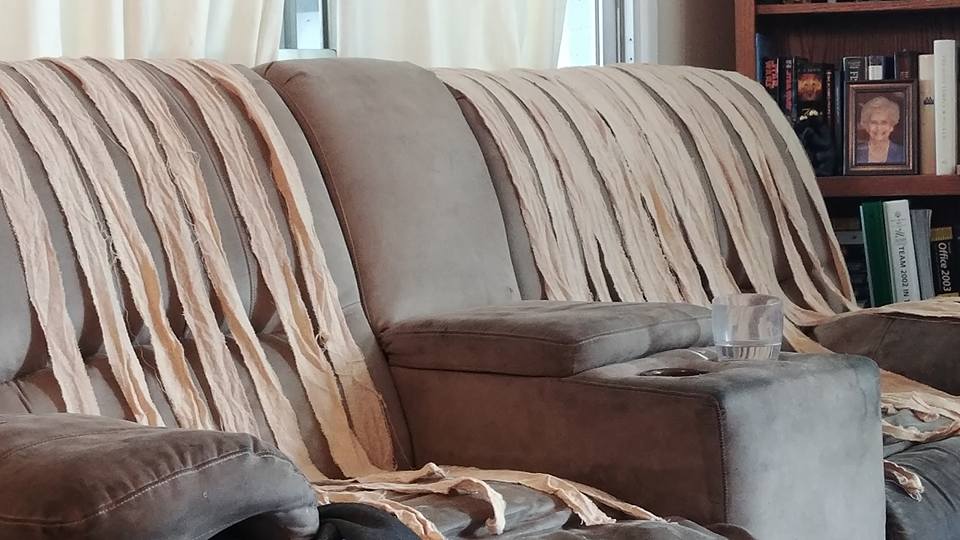
Next, I started on the extremity wrappings. To do that, I needed to tea-dye some cloth...
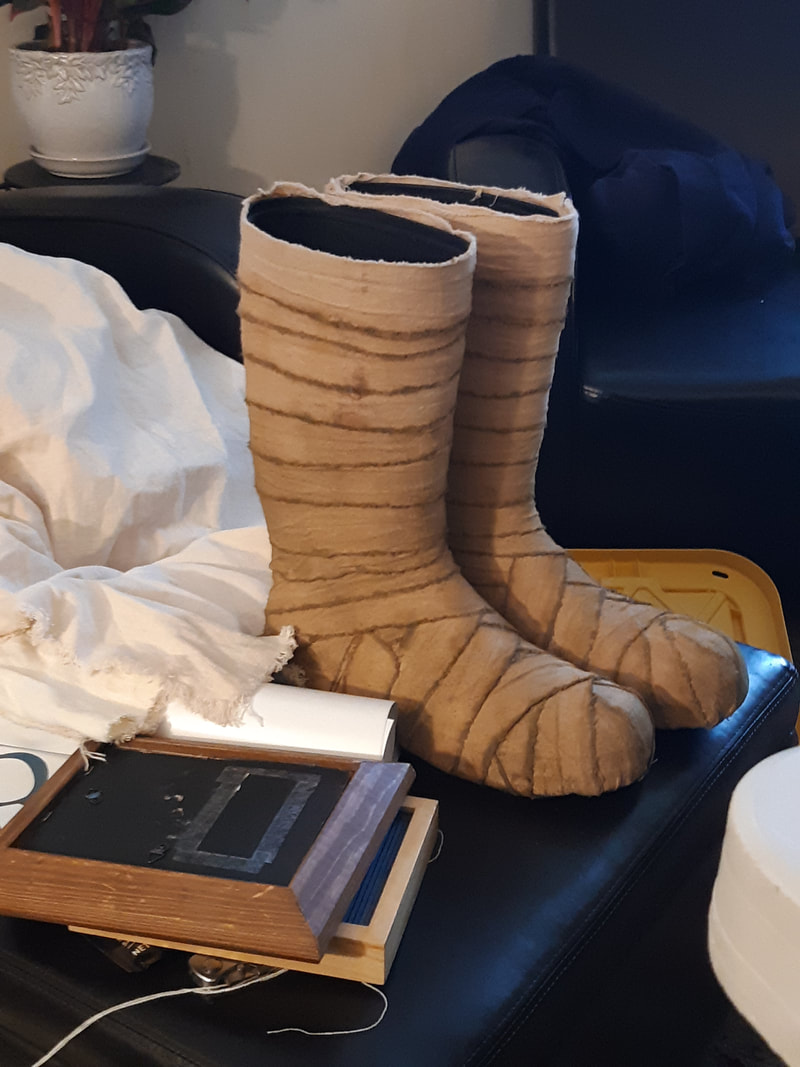
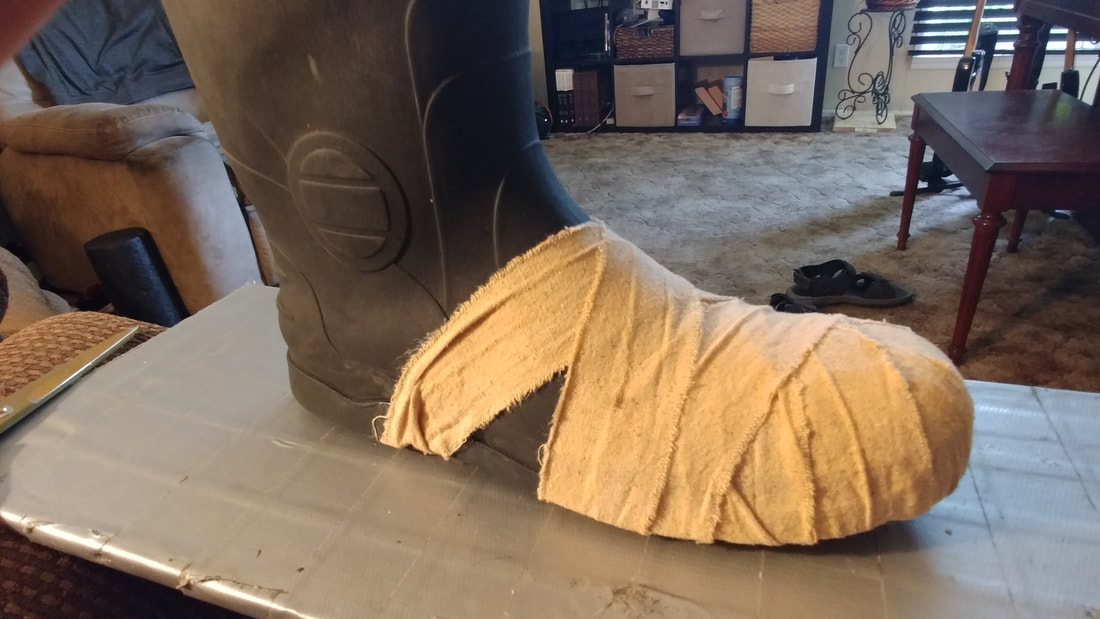
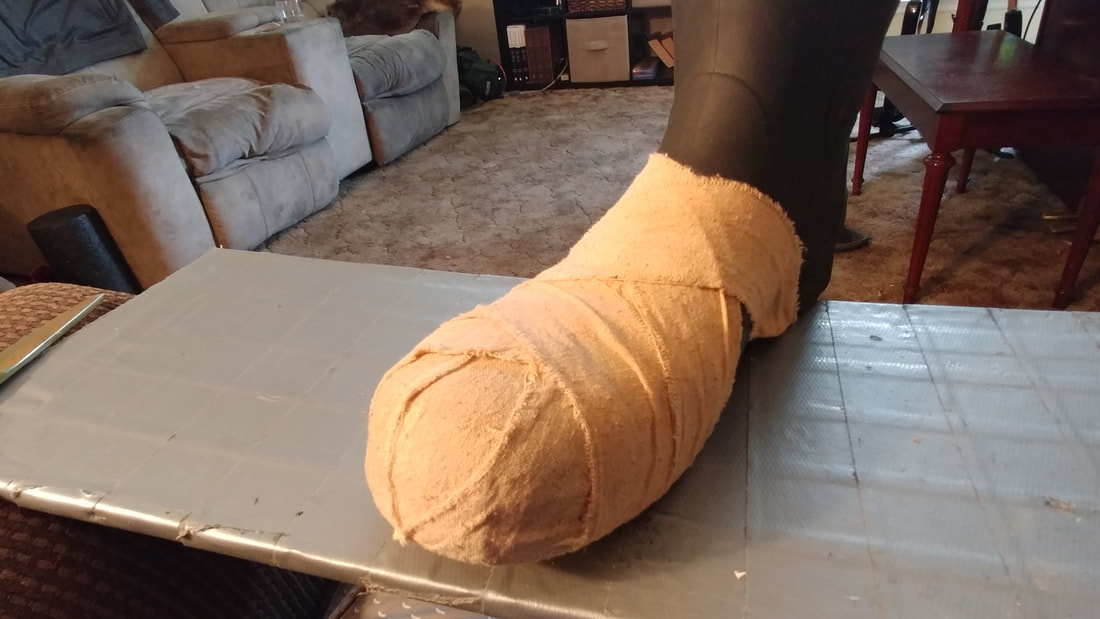
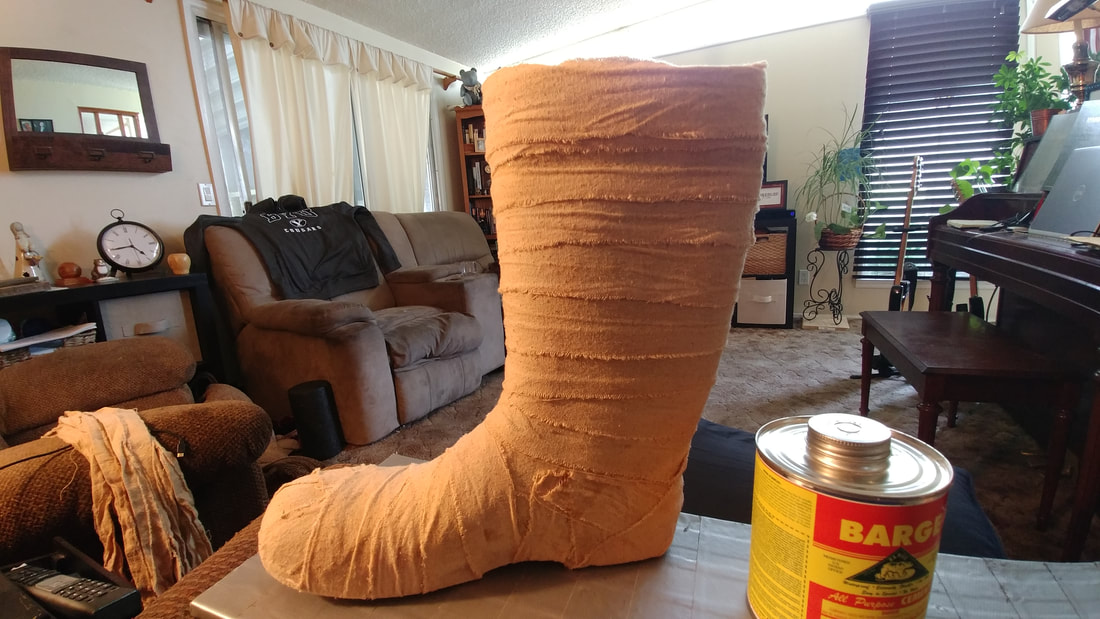
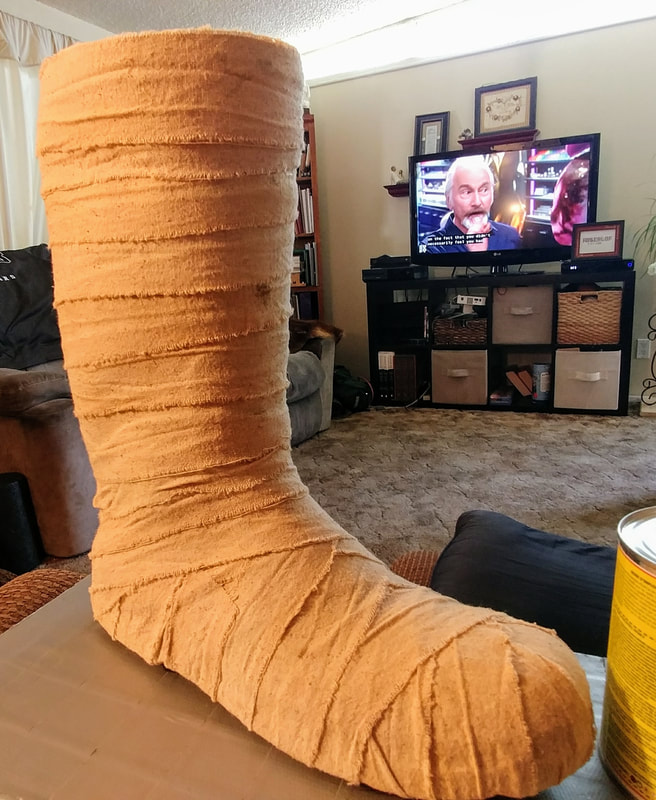
Once that was dry, I started on the boots. I used a pair of rubber work boots that had a hole in the heel, and were going to be thrown out by my neighbor if they didn't sell in his yard sale.
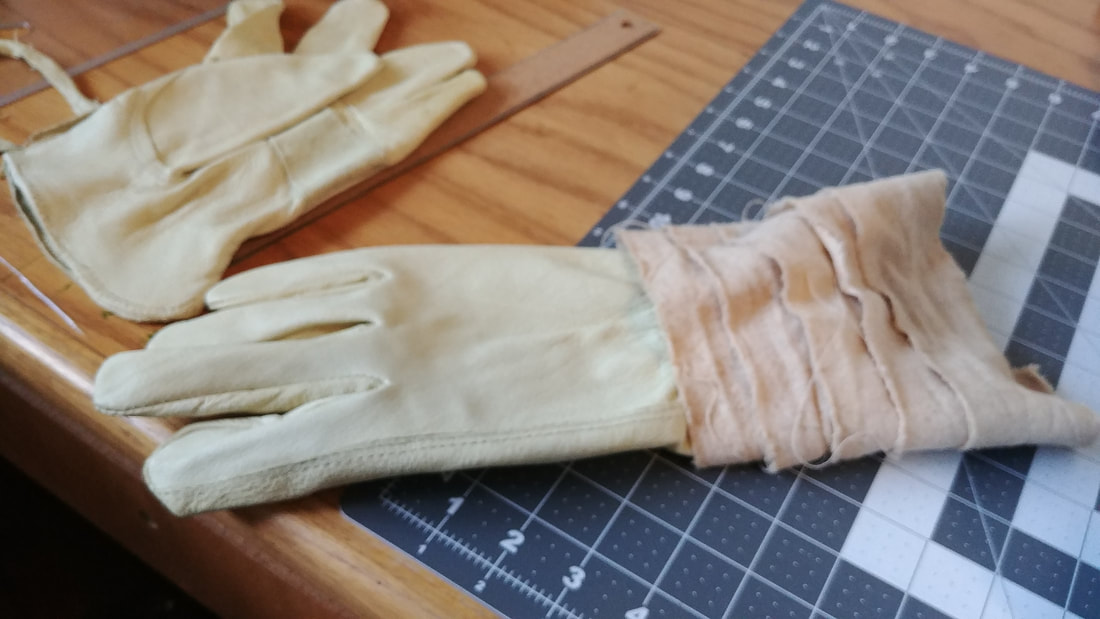
Next came the gloves and arm wraps. I actually sewed the arm wraps into a tube and onto the leather glove to make a gauntlet that is much easier to put on and take off.
Bandoliers were next. The "Bantha Rider" Tusken Raider from Star Wars: A New Hope wears 3. Two of them are 1908 Enfield Bandoliers, and the other is something of Turkish design. I used paper to make a pattern, and then used vinyl (pretend-leather, or "pleather") and my leather-working skills to make the bandoliers.
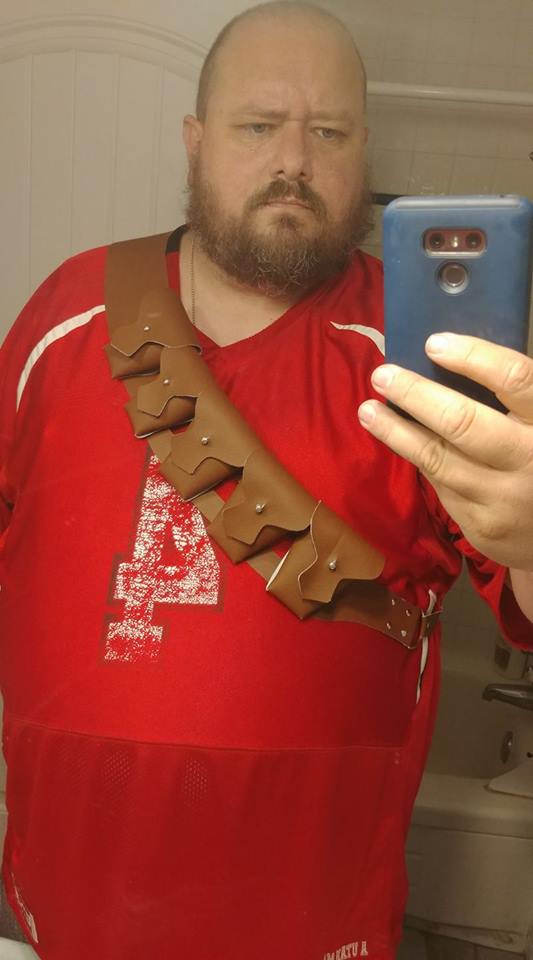
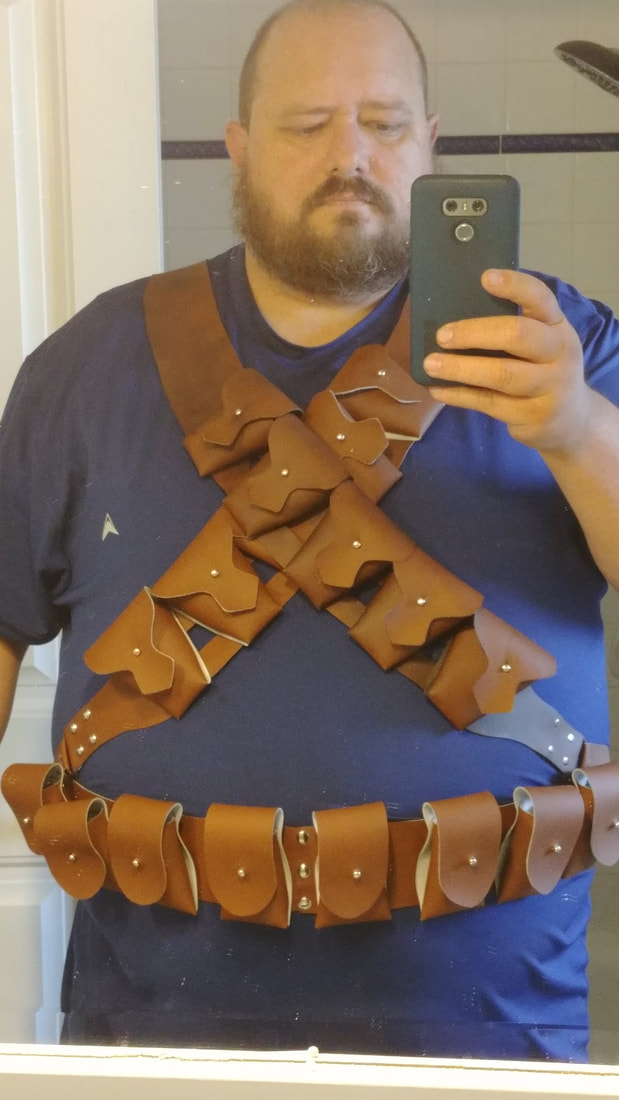
Of course, all parts of this costume will need weathering to make them look more realistic. The 1908 Enfield on the right (above) has the first step of weathering done. It looks like leather now, instead of vinyl.
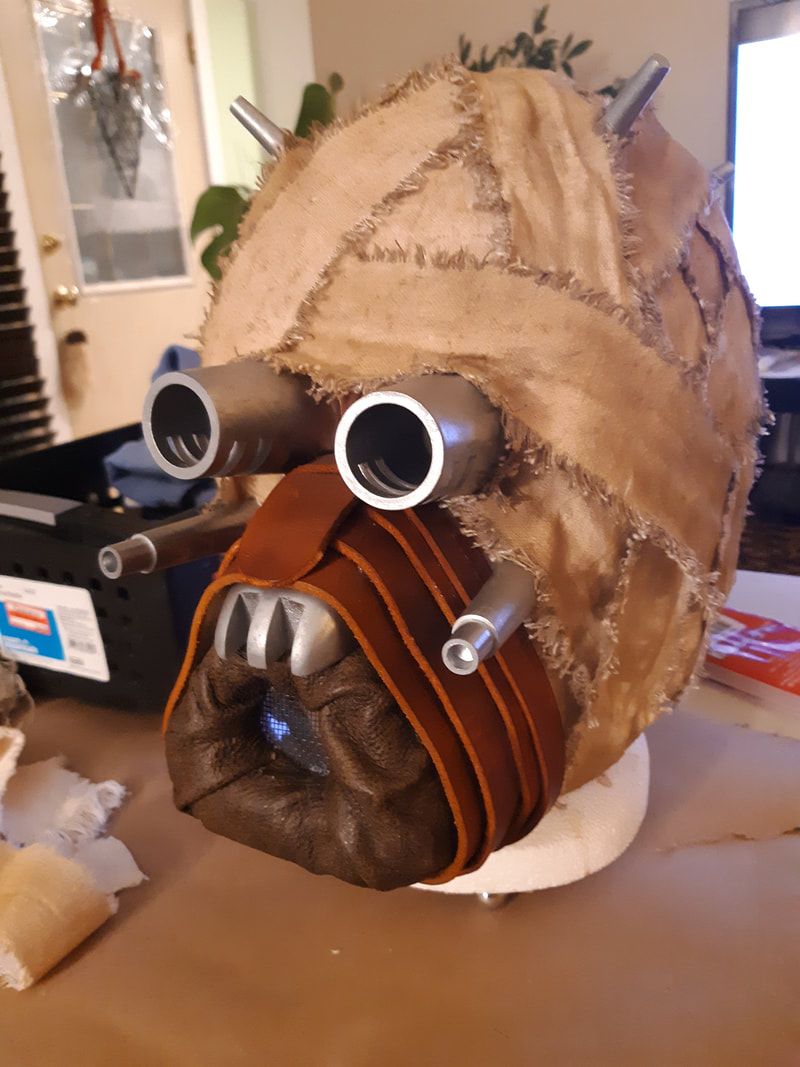
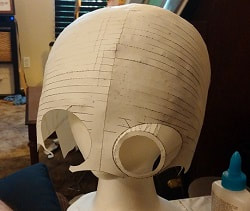
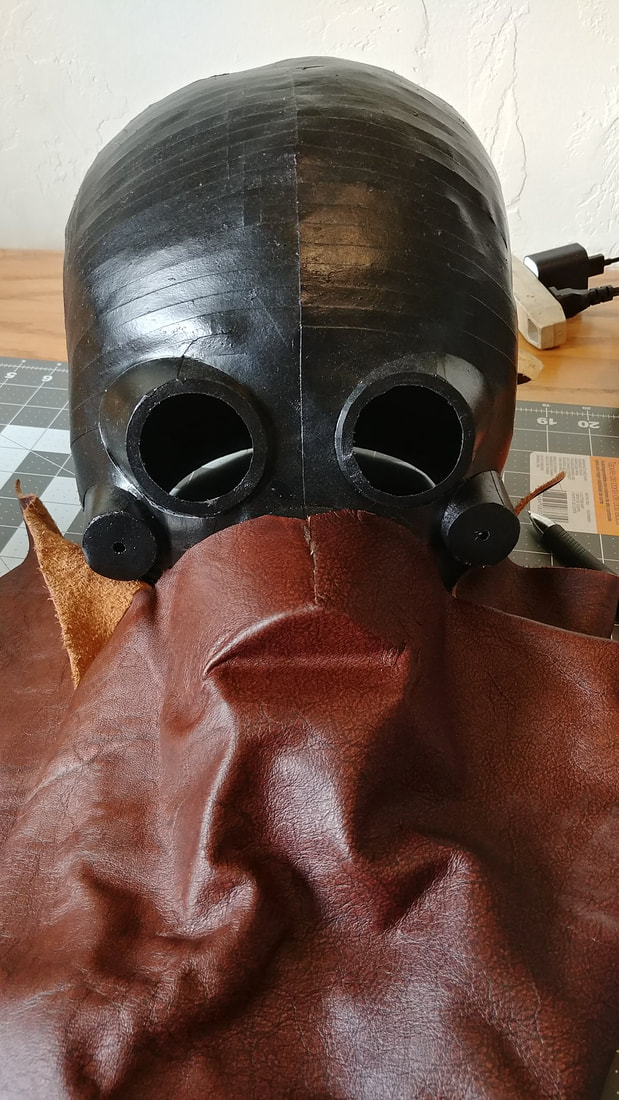
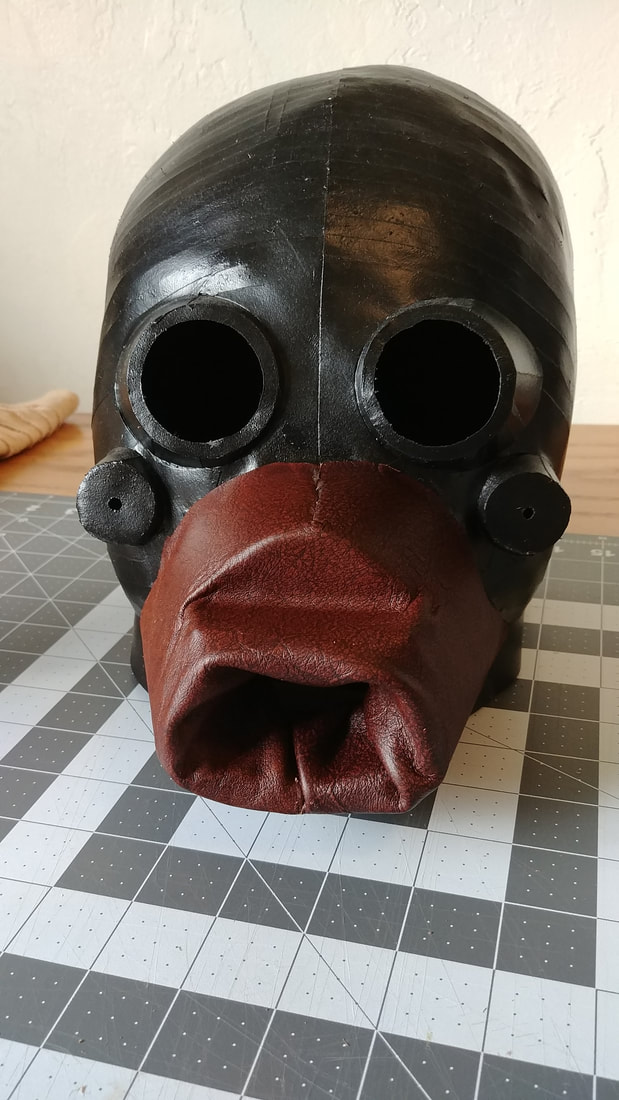
I now have gone back to work on the helmet, leather-wrapping the snout (real leather), and adding the "metal" (3D Printed) pieces. Then the whole head is wrapped with the cloth, and finally, the last four head spikes will be added (not present yet).
I now have gone back to work on the helmet, leather-wrapping the snout (real leather), and adding the "metal" (3D Printed) pieces. Then the whole head is wrapped with the cloth, and finally, the last four head spikes will be added (not present yet).

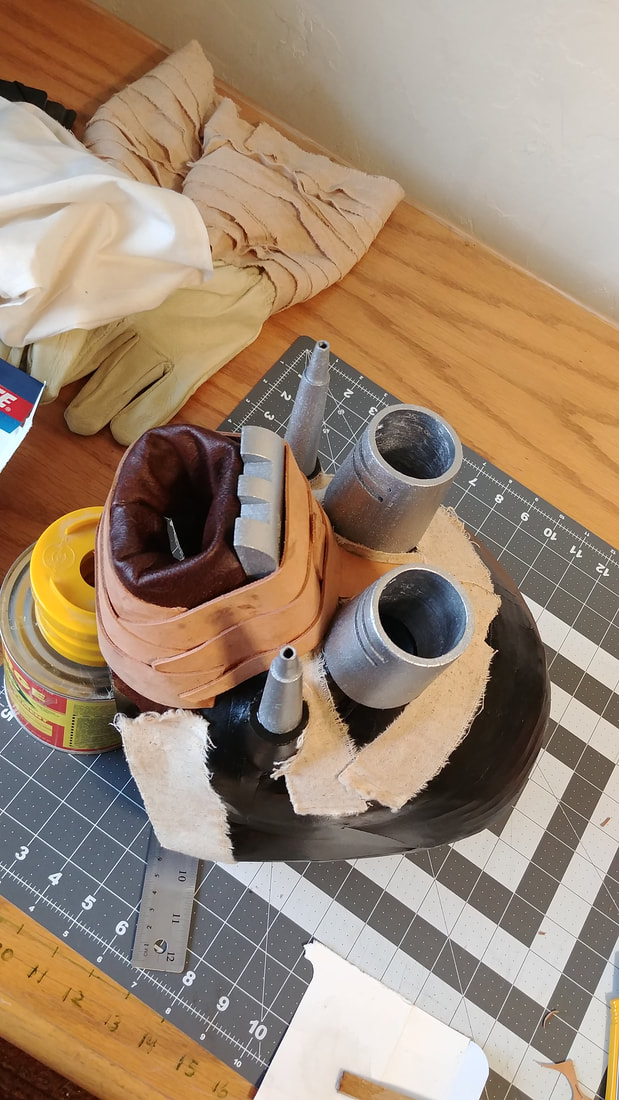
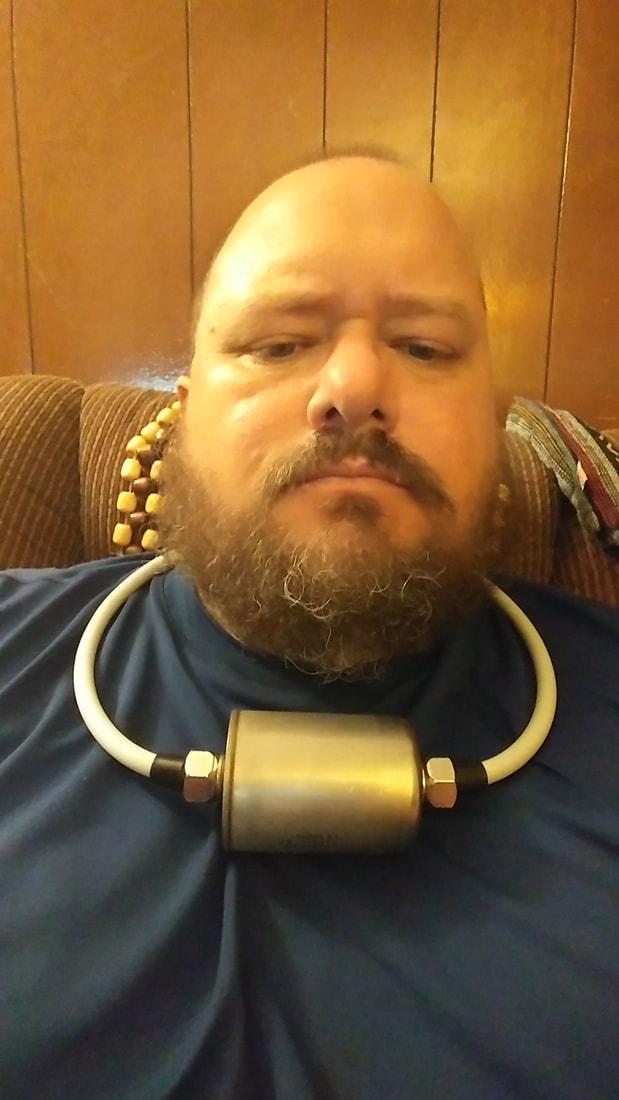
Next I started the build on the "re-breather" canister that hangs around the Tusken's neck.
For the canister, I used a large fuel filter for a big truck from my local auto parts store. The tubing around the neck is PVC tubing, and the tapered ends on the canister are cut from a vacuum hose connector (automotive). I ran a 12 gauge stainless steel welding rod through the PVC so that I could form it into the shape I wanted. Once this is epoxied together, it will be painted to look like metal, and the canister will be wrapped in leather.
For the canister, I used a large fuel filter for a big truck from my local auto parts store. The tubing around the neck is PVC tubing, and the tapered ends on the canister are cut from a vacuum hose connector (automotive). I ran a 12 gauge stainless steel welding rod through the PVC so that I could form it into the shape I wanted. Once this is epoxied together, it will be painted to look like metal, and the canister will be wrapped in leather.
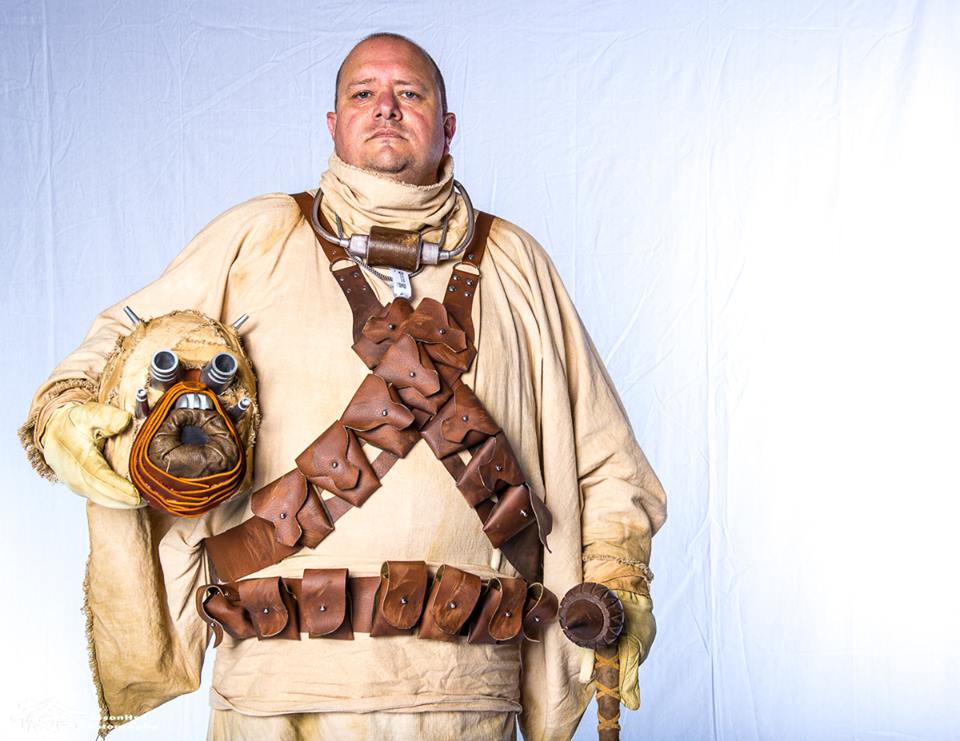
Here is the finished product. It's not perfect, and doesn't pass muster for the 501st - yet - but I'm proud of the work I've done.